Reviewing and correcting
Ztract's biggest difference from a plain OCR service: every value is anchored to its source, the engine tells you which fields it's unsure about, and you can fix wrong values without paying for a re-run.
Updated:
Opening the side-by-side viewer
After a document finishes processing, click it in the project’s documents list. The dashboard opens the side-by-side viewer: the original document on the left, the extracted fields on the right. The viewer is built for two motions you’ll repeat hundreds of times:
- Confirm a value matches what’s on the page.
- Fix one that doesn’t.
Click a field, see its source
Click any extracted field on the right and the matching region highlights on the source document on the left. Click a region on the source and the corresponding field scrolls into view on the right. This works for everything — scalar fields, line-item cells in a table, individual chips in a multi-value array. Every value has a bounding box, and that bounding box is what anchors the field to its origin.
Multi-page documents (like contracts) stack the source pages vertically. Click a field that lives on page 6 of a 7-page contract and the viewer scrolls to page 6 with the value centered. No more “where did this number come from?” guesswork during audits or hand-offs.
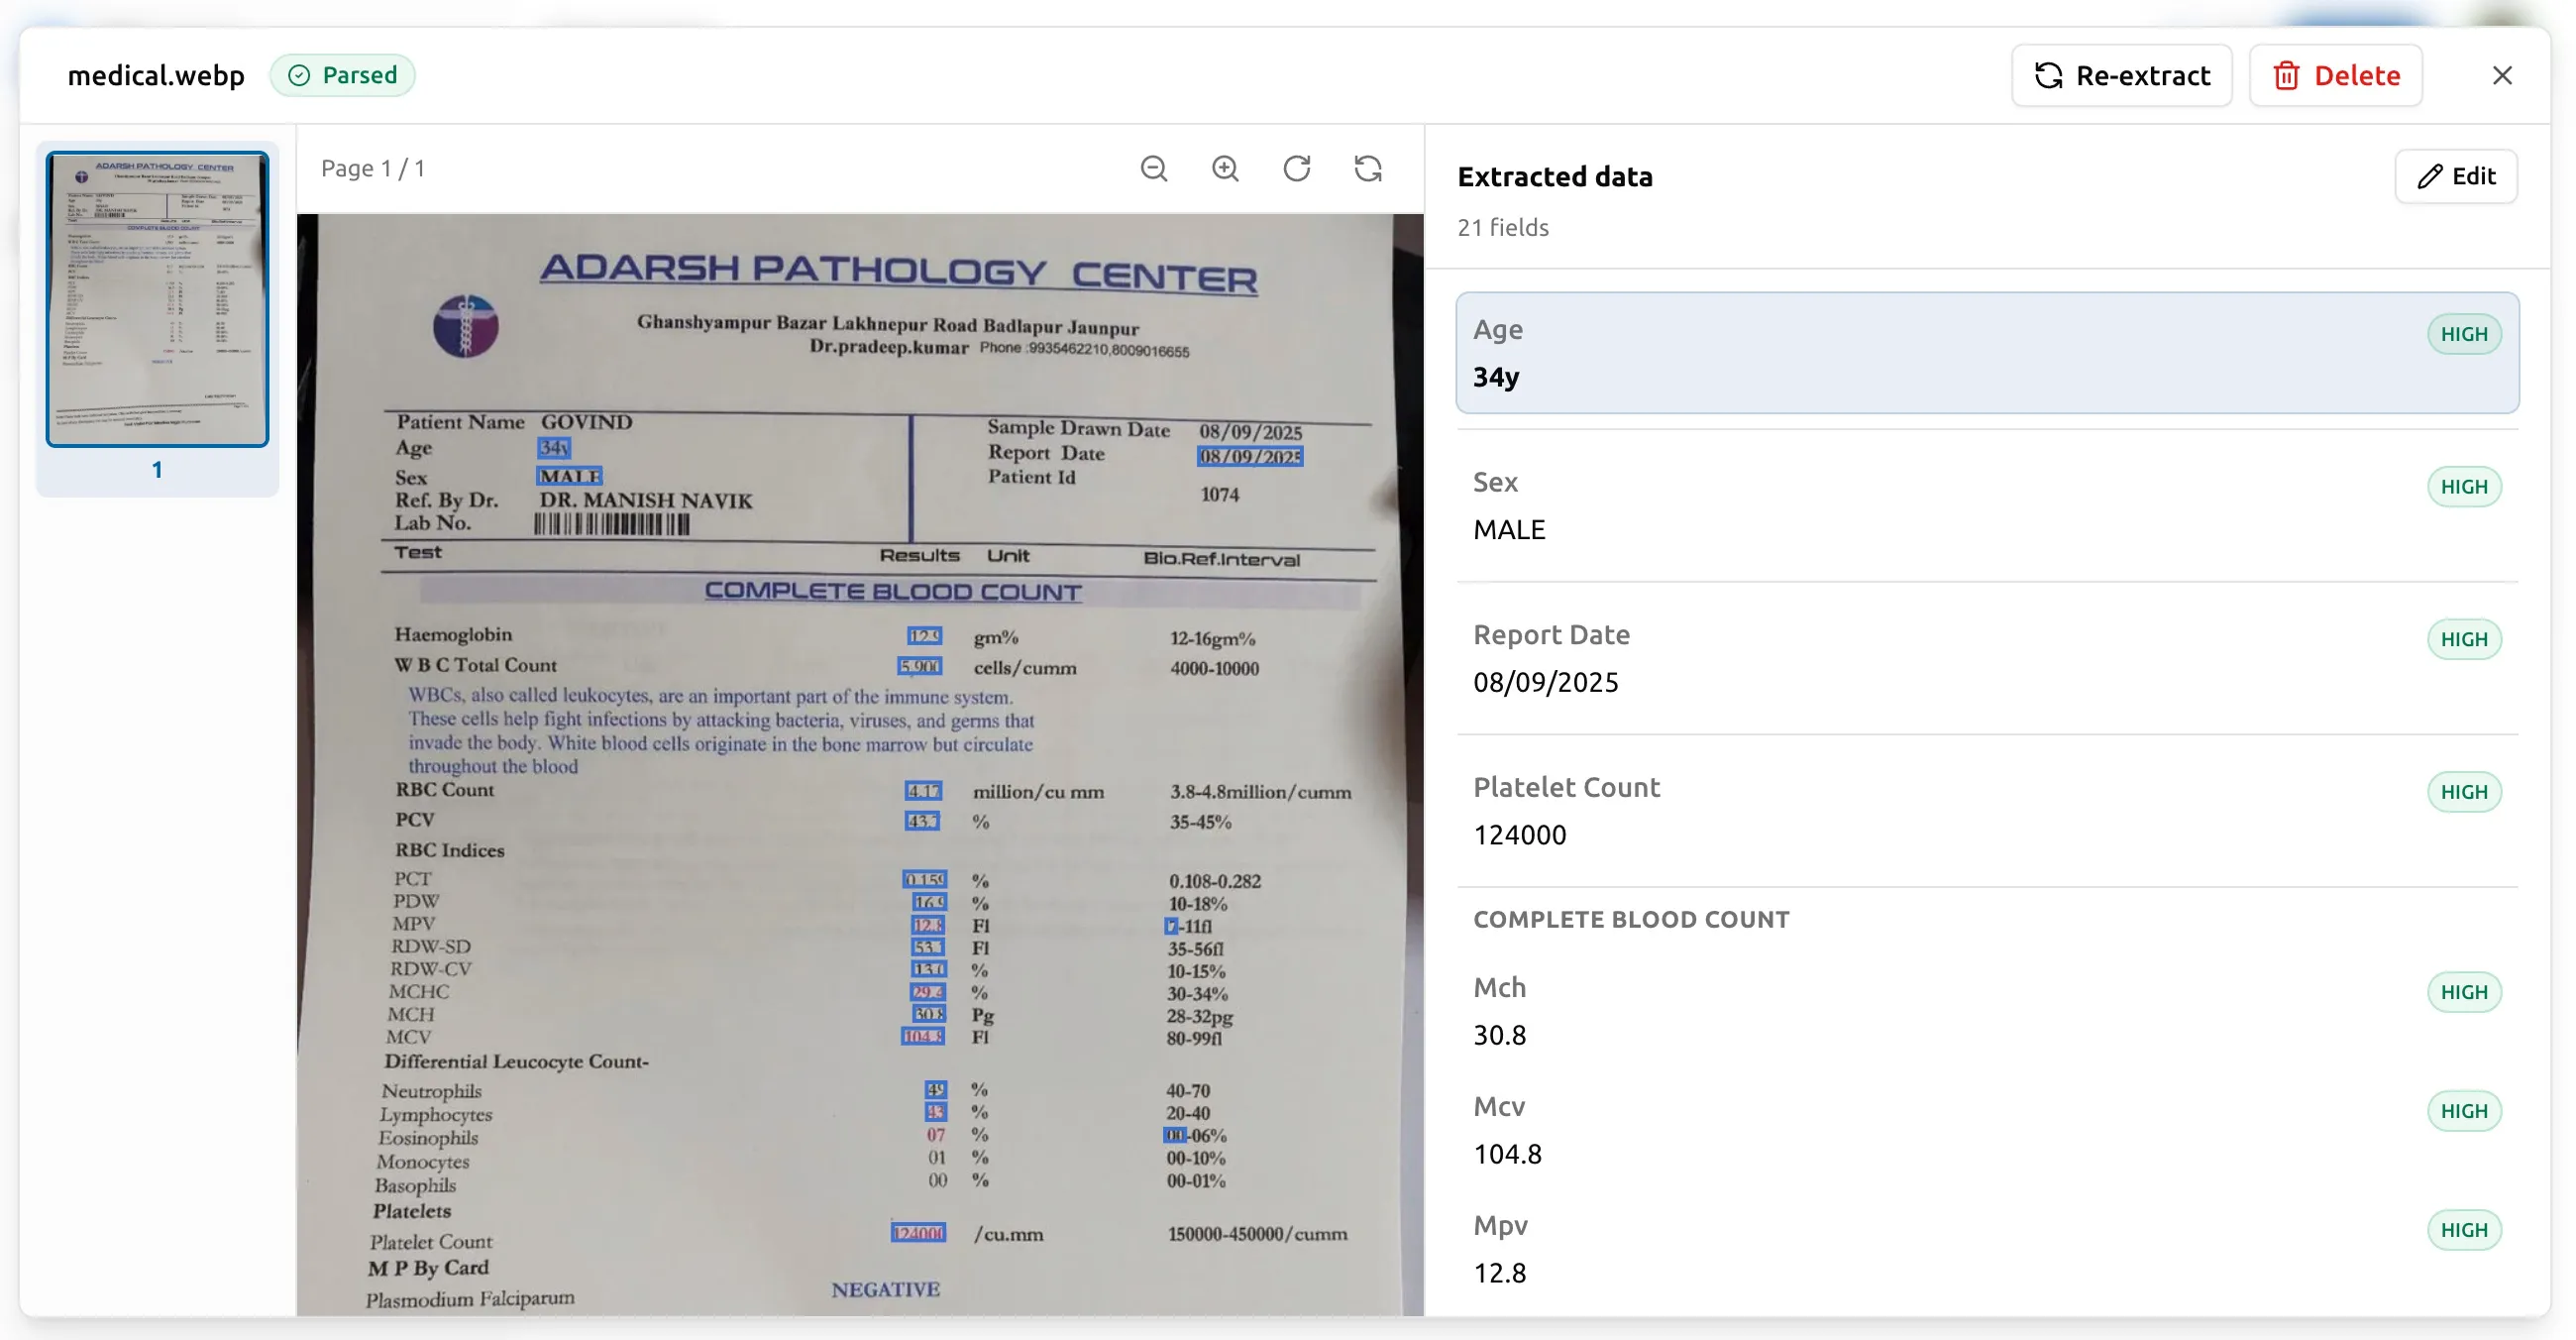
Per-field confidence scores
Every extracted value comes with a confidence score from the engine. Values the engine is highly confident in (the vendor name printed in 24-point text at the top of the page) are unflagged. Values the engine is less sure about (a date scribbled in the margin, a number that could be 8 or B) are visually flagged so you know exactly which fields to verify.
This matters because the cost of perfect accuracy on every field is much higher than the cost of catching the few that might be wrong. Confidence flags let you spot-check the suspect 5% instead of re-reading 100% of the output.
Correcting a wrong value
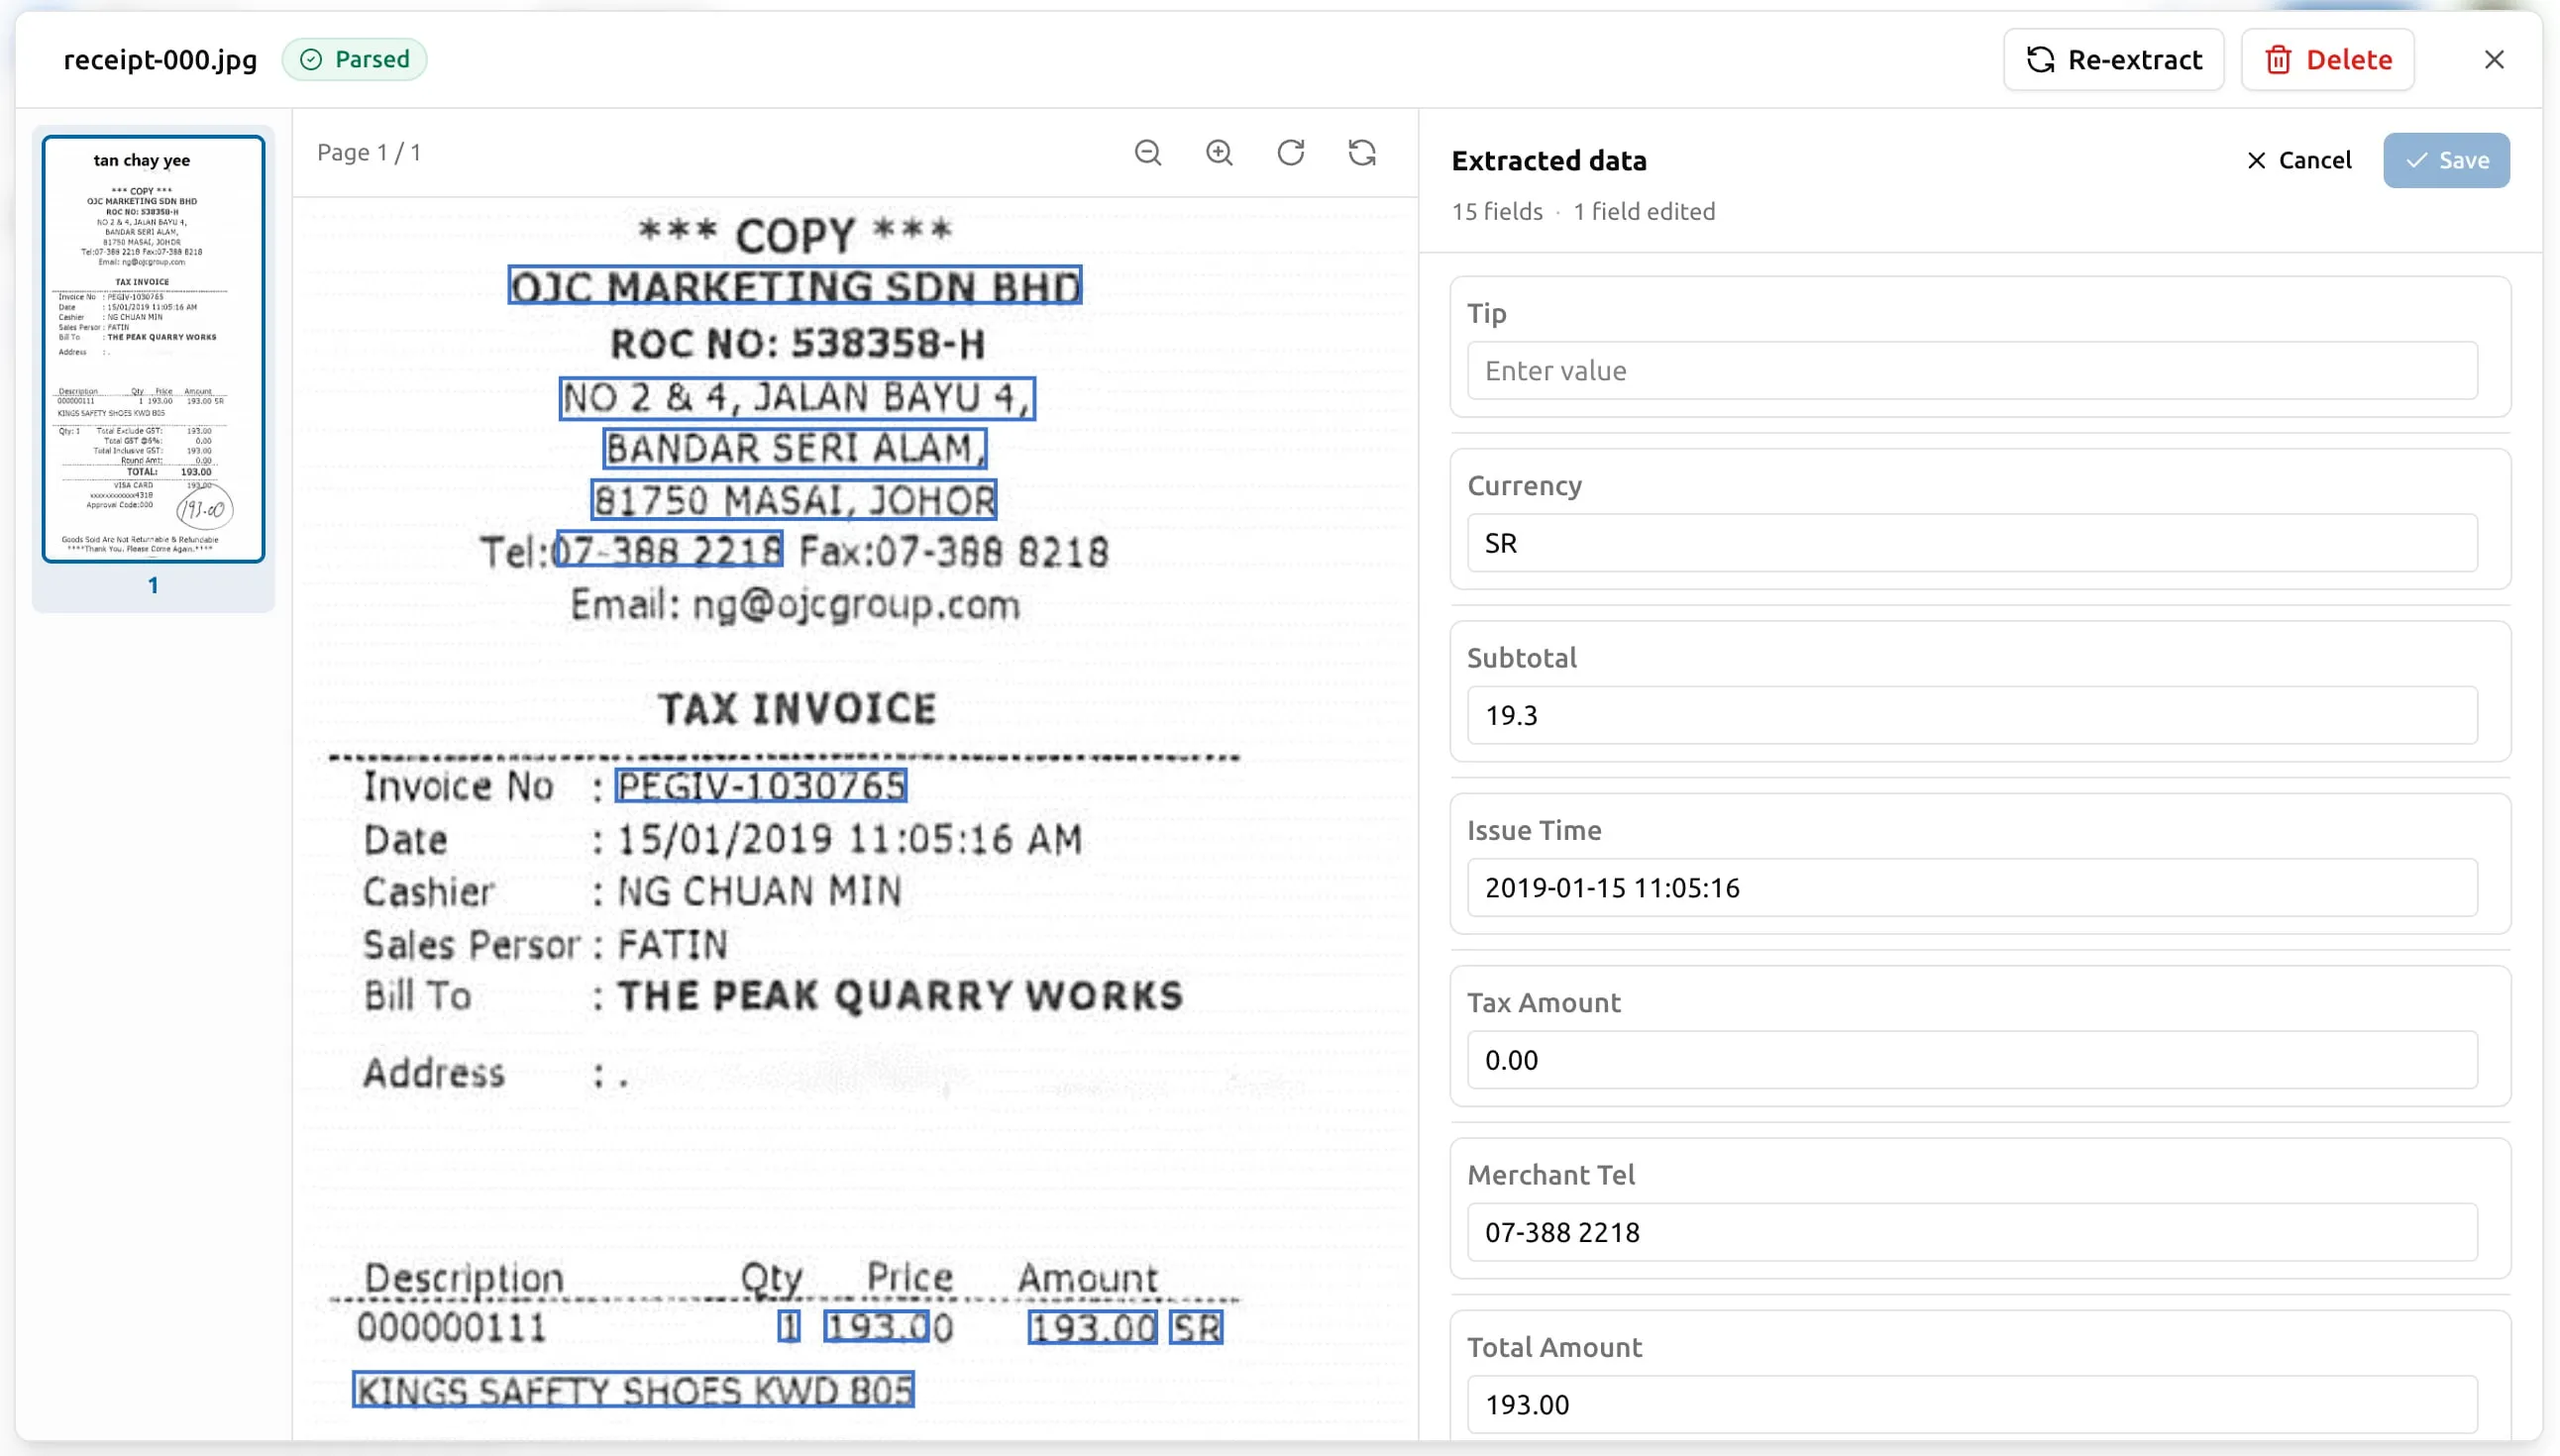
To enter edit mode, click Edit at the top of the Extracted data panel. Every value becomes an inline input. Walk through the flagged fields:
- Click the field’s value.
- Type the correct one.
- Press Enter, or move to another field.
When you’re done, click Save — the panel’s button shows how many fields you’ve touched, e.g. “Save (3)”. To leave without keeping the edits, click Cancel.
Three things to know about corrections:
- You don’t pay for a re-run. The engine isn’t re-invoked when you edit a field; you’re updating a per-document overlay on top of the original extraction. Free.
- The original bounding box stays attached to the corrected value. If an auditor asks “where did this number come from?”, the side-by-side viewer still points to the right region on the source document.
- Corrections are persistent. They survive re-exports, schema edits, and account sessions. You don’t have to re-fix the same field next week.
Reverting an edit
Edited fields are marked with a small pencil badge in the panel. You have two ways to back out:
- Per top-level field: open the field’s header in the panel and click Revert — the original engine value comes back for that field only.
- All edits on this extraction: click Clear all edits at the top of the panel.
Both actions are immediate; the next export reflects them.
What corrections don’t do
A correction is a per-document override. It does not:
- Change the document’s source file (PDFs and images are immutable in storage).
- Tell the engine to do anything differently on the next document. If you keep correcting the same field across many documents, the schema or document quality is the lever, not corrections.
- Trigger a re-run of the extraction. If you want a fresh extraction with a different schema, see the next section.
Re-running with a different schema
If you change the schema after a document has been processed, the existing extraction reflects the old schema. Affected documents are flagged with an amber Schema updated badge in the documents list, and the detail dialog adds the same hint at the top so you can spot them at a glance.
To get the new shape you’d re-run that document against the new schema. Two options:
- One document at a time. Open the row’s
⋯menu and pick Re-extract, or use the same action from inside the detail dialog. The status will flip back to pending while the worker picks it up; the dialog polls and updates automatically. - Every stale document at once. The Re-extract stale button at the top of the documents list re-runs every flagged document in the project. The dialog tells you the page cost before you confirm.
Re-runs do cost pages — each pass through the engine deducts pages at the same per-page rate as the first run. For this reason, most teams finalize their schema on a small batch (say, 5–10 documents) before processing volume. Get the field names, nesting, and types right on the sample, then turn the volume up.
Failed pages
If a page failed during initial extraction, the dashboard shows it with the reason. You can:
- Re-upload the source if you’ve fixed it (e.g., removed password protection, re-exported the PDF from the original tool).
- Skip it if it’s not worth solving.
Failed pages are refunded to your pack — you don’t pay for what the engine couldn’t read.